Below is the step-by-step process for adding a new customer using the ScanShell 800 ID Scanner.


| » | Click the New button in the lower right corner of the Customer Listing window. |
| » | Insert the ID into the middle of the scanner face down, top first. |
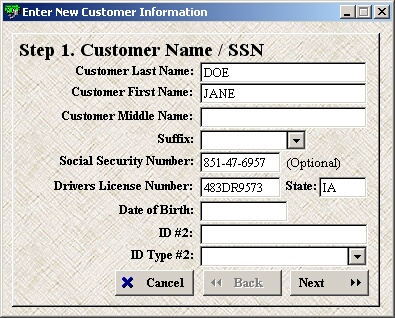
| » | When using the ID Scanner, the following fields will automatically be populated with the information from the customer's ID: |
Last Name, First Name, Middle Name, Suffix;
Drivers License Number and State; and
Date of Birth.
| » | Fill in the rest of the desired customer information. |
| » | Click Next to continue or Cancel to quit without saving. |
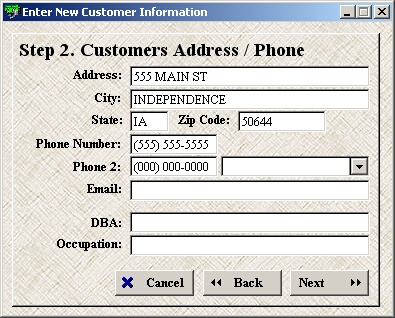
| » | When using the ID Scanner, the following fields will automatically be populated with the information from the customer's ID: |
| » | Address, City, State, and Zip Code. |
| » | Fill in the desired information about the customer's address and phone on Step 2. |
| » | DBA stands for Doing Business As. This could be the customer's Company Name if they are self employed. |
| » | Click Next to continue, Back to return to Step 1, or Cancel to quit without saving. |
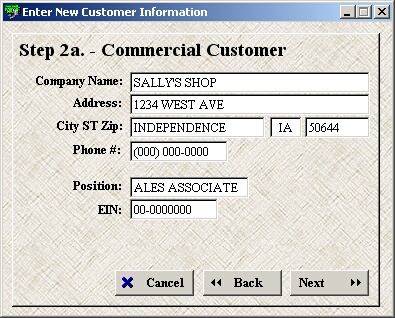
| » | Even with using the ID Scanner, no fields on Step 2a are automatically populated. |
| » | Fill in the desired information about a Commercial Customer on Step 2a. This is not necessarily the customer's employer but the company they may be cashing a check for on their behalf. This will be who the check is payable to. |
| » | Click Next to continue, Back to return to Step 2, or Cancel to quit without saving. |
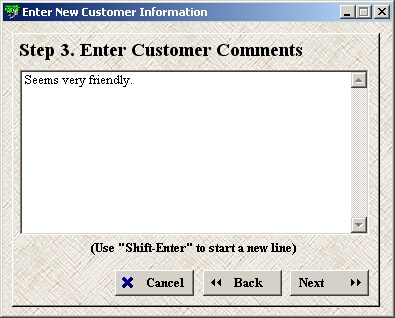
| » | Even with using the ID Scanner, no fields on Step 3 are automatically populated. |
| » | Add any desired customer comments on Step 3. |
| » | Click Next to continue, Back to return to Step 2a, or Cancel to quit without saving. |
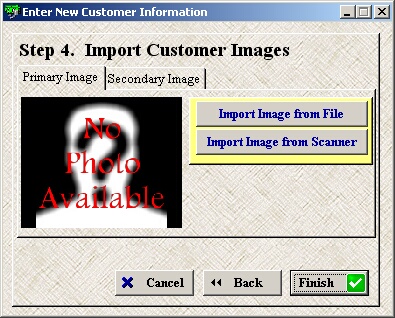
| » | This ID Scanner has the capability to automatically add a Primary and Secondary Image from the ID. To view complete details on image setup, please see Scanner/Equipment/MoneyGram (ID Scanner section). |
| » | If you have chosen to not automatically populate one of both images from the customer's ID, follow the next steps to add an image from another source. |
| » | Import a customer image on Step 4 (Primary Image tab). |
| » | Import Image from File allows you to browse your computer to upload an already saved image. |
| » | Import Image from Scanner allows you take a picture using your webcam (if installed and activated). |
| » | Move to the Secondary Image tab to add second image. |
| » | Click Finish to continue, Back to return to Step 3, or Cancel to quit without saving. |
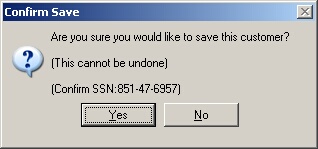
| » | Click Yes to confirm you want to save this new customer. |
| » | This can not be undone. However, you can delete the customer at a later date. To view complete details on deleting a customer, please see Delete Customer. |
| » | Click No to return to Step 4. |
After clicking Yes, the process is complete unless you have a fingerprint reader activated. In that case, you will be then be asked if you would like to add the customer's fingerprint.

| » | Click Yes to add the customer's fingerprint. |
| » | Click No to save the customer without adding their fingerprint. |
| » | A fingerprint can be added at a later date if desired. To view complete details on how to add a fingerprint at a later time, please see Add/Delete Fingerprint. |
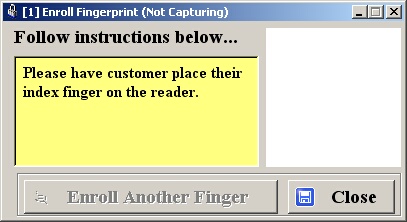
| » | On the initial screen, have the customer place his/her finger on the reader. |
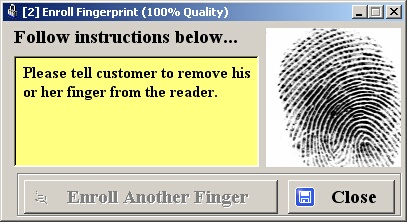
| » | Once the reader has obtained an image (60% minimum quality), you will be asked to have the customer remove their finger. |
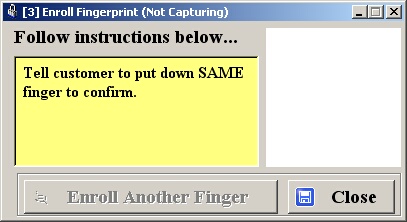
| » | Once the image has cleared, have the customer place the same finger on the reader again. |
| » | This is to confirm that a good read was taken during Step 1. |
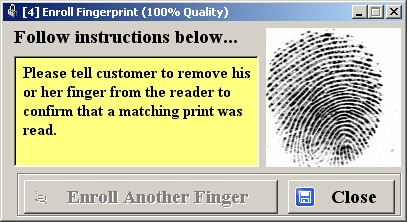
| » | Once the reader has obtained an image (60% minimum quality), you will be asked to have the customer remove their finger again. |
| » | The program will now search the database to make sure an existing match was not found. |
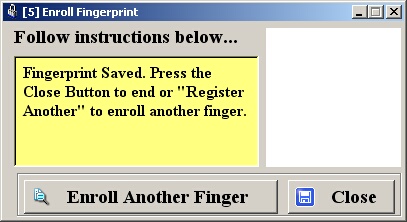
| » | The fingerprint will be saved if both prints matched and there were no duplicate prints found. |
| » | Click Enroll Another Finger to add another print to the customer's file. |
| » | Click Close to save the print and exit. |
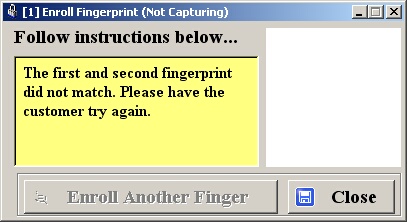
| » | If both prints did not match you will be asked to repeat the above process. To begin the process, have the customer place his/her finger on the reader. |
| » | Otherwise, click Close to exit without saving a fingerprint. |
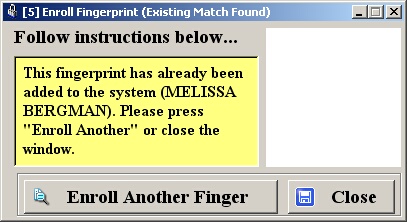
| » | The fingerprint will not be saved if both prints matched but there was a duplicate print found. |
| » | You will then be notified of who these prints are linked to. |
| » | Click Enroll Another Finger to start the process over. |
| » | Click Close to exit without saving a fingerprint. |
Page url:
http://www.ksoftcorp.com/help/index.html?using_scanshell_800.htm


